> ## Documentation Index
> Fetch the complete documentation index at: https://docs.mistle.dev/llms.txt
> Use this file to discover all available pages before exploring further.
# Quickstart
> Create your first sandbox instance in Mistle.
## Overview
Use this guide to connect OpenAI and GitHub, publish a sandbox profile, wait for its snapshot, and start your first session.
## Prerequisites
* Access to a Mistle workspace
* An OpenAI API key or ChatGPT subscription
* A GitHub account with access to the repositories the agent should work in
## Connect OpenAI
Open **Integrations**, choose **OpenAI**, and create a connection.
For a simple first run, use **API key** and enter the OpenAI API key Mistle should use for model access.
If your workspace uses interactive ChatGPT access instead, choose **ChatGPT subscription** and complete the device-authorization flow.
Read [OpenAI](/guides/openai-integration-setup) for the full connection options.
## Connect GitHub
Open **Integrations**, choose **GitHub**, and create a connection.
For a simple first run, use **GitHub App installation** with **Create from manifest**. Mistle builds the GitHub App manifest, sends you to GitHub to create and install the app, then returns you to Mistle to complete the connection.
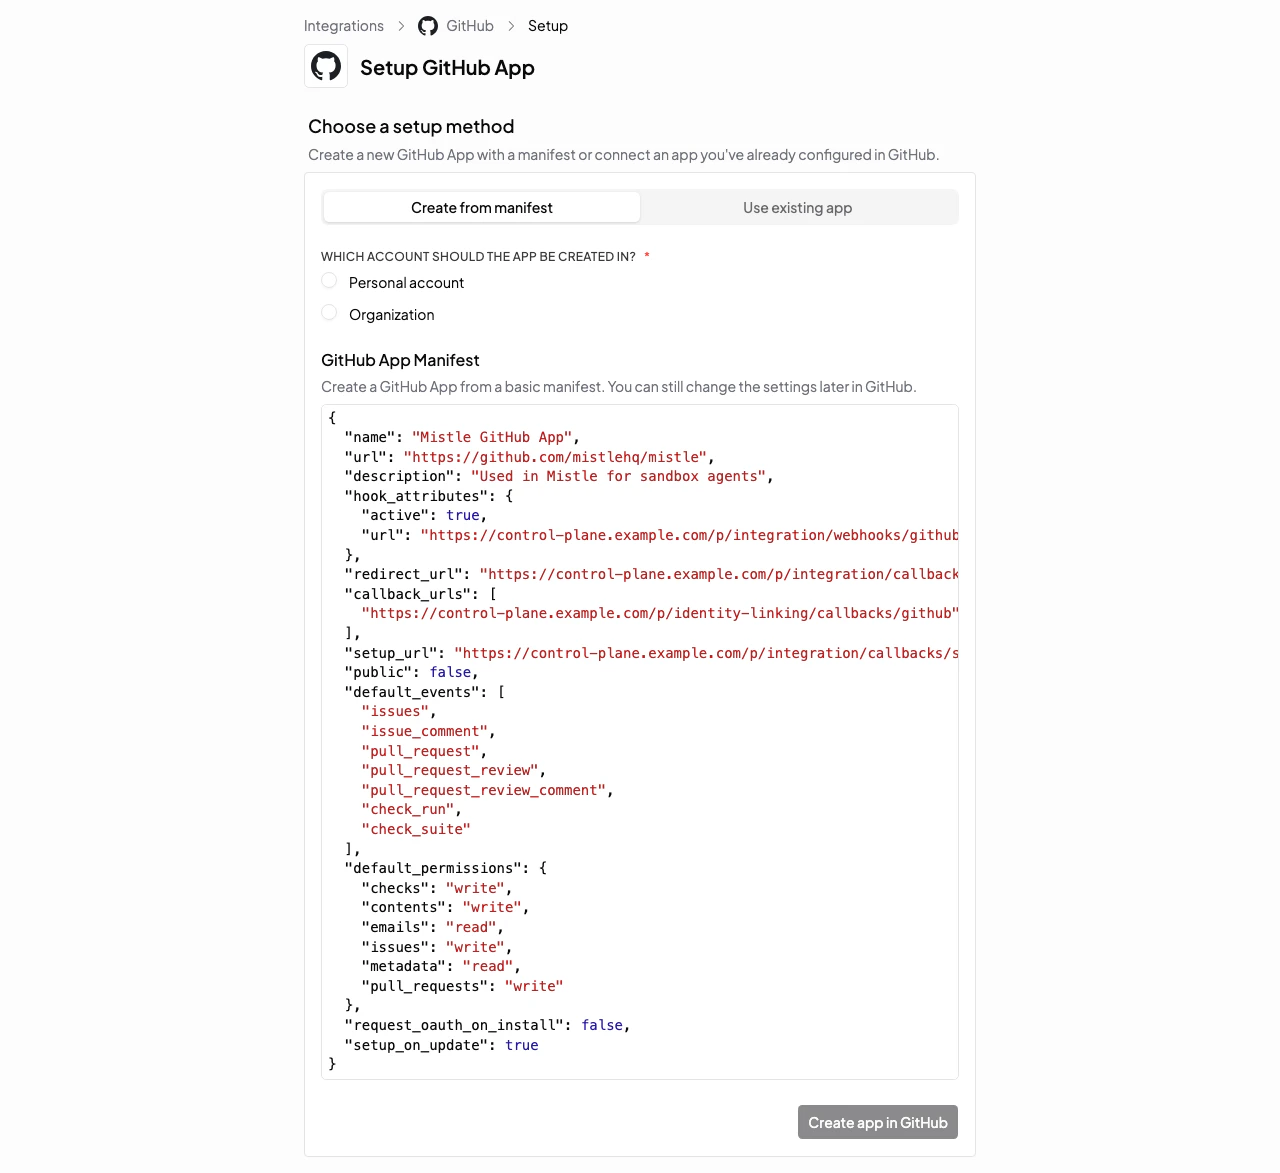 Read [GitHub](/guides/github-integration-setup) for existing-app setup, API-key setup, and GitHub Enterprise Server notes.
## Create A Sandbox Profile
Open **Sandbox Profiles** and create a new profile.
Configure the draft profile with:
* **Agent**: choose Codex for an OpenAI-backed first session.
* **Git Connection**: choose the GitHub connection you created.
* **Model provider**: choose the OpenAI connection you created.
* **Setup script**: add the setup commands the agent's sandbox should run before sessions start.
Read [GitHub](/guides/github-integration-setup) for existing-app setup, API-key setup, and GitHub Enterprise Server notes.
## Create A Sandbox Profile
Open **Sandbox Profiles** and create a new profile.
Configure the draft profile with:
* **Agent**: choose Codex for an OpenAI-backed first session.
* **Git Connection**: choose the GitHub connection you created.
* **Model provider**: choose the OpenAI connection you created.
* **Setup script**: add the setup commands the agent's sandbox should run before sessions start.
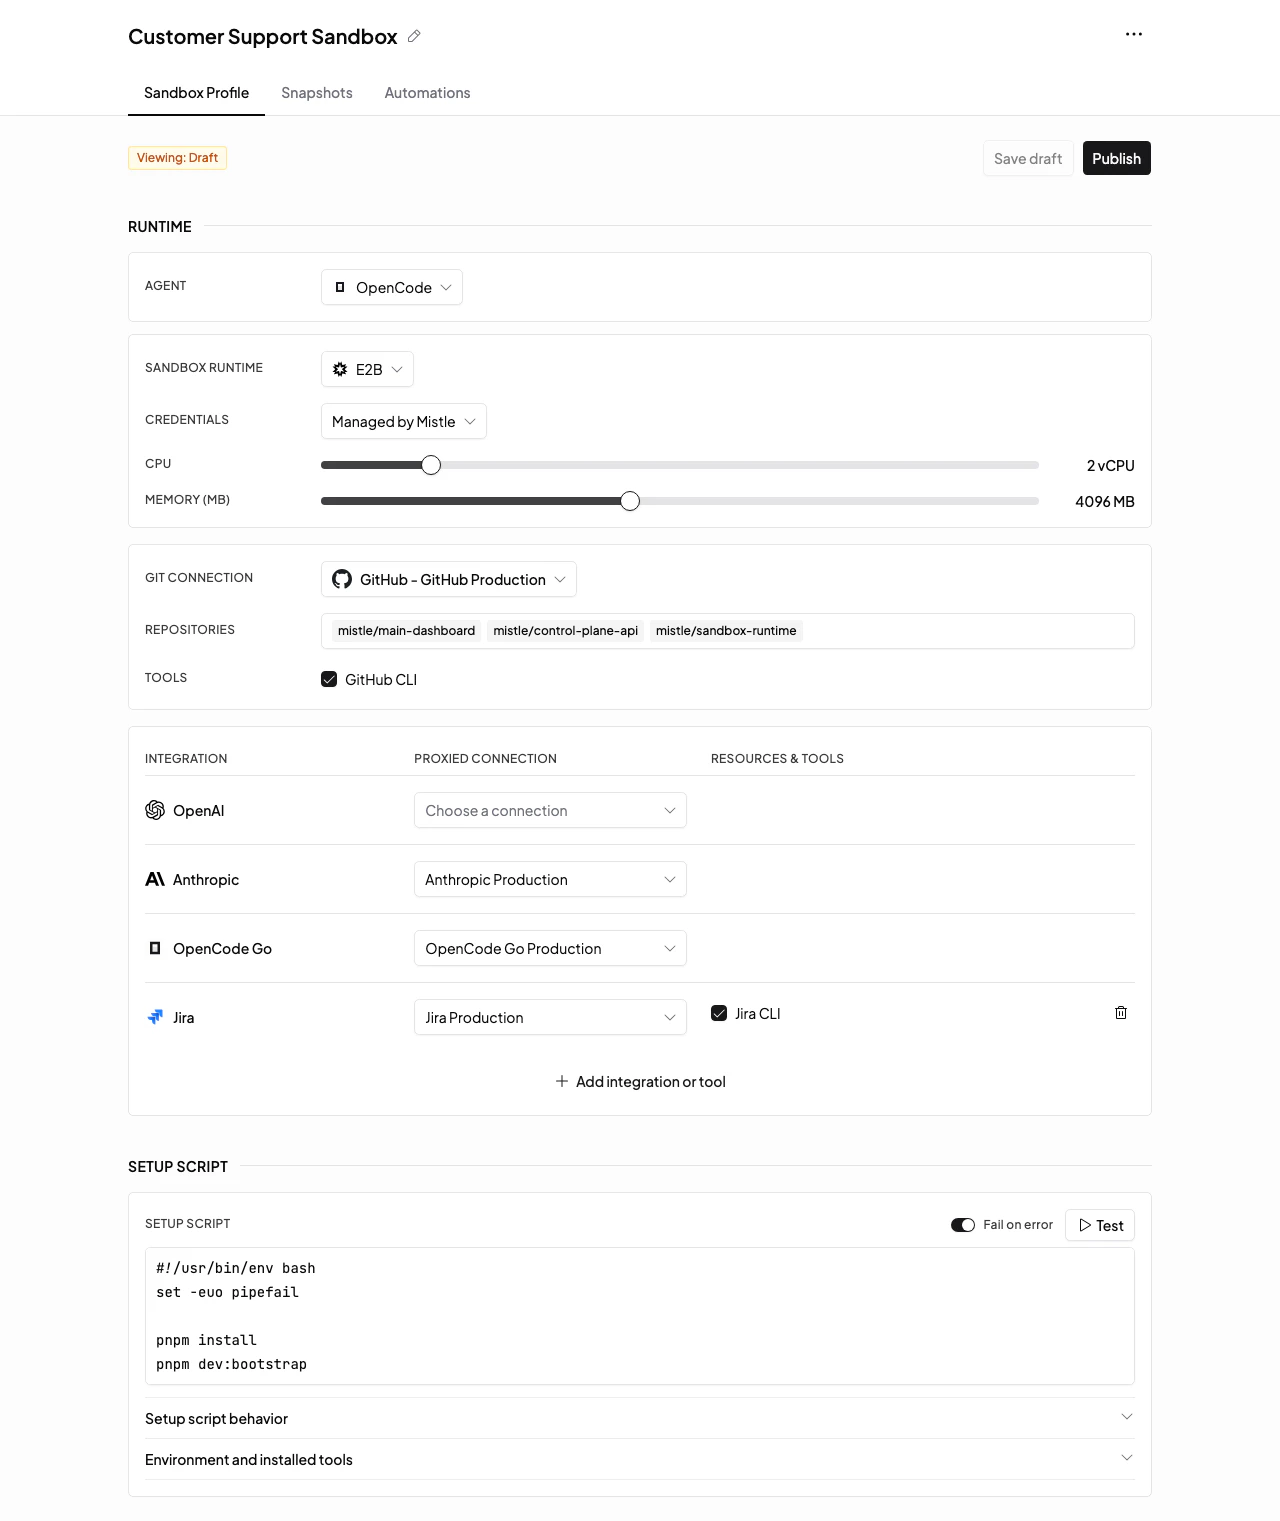 Save the draft when your profile settings are ready.
## Publish And Wait For The Snapshot
Select **Publish** on the draft profile version.
Publishing creates the published profile version and queues snapshot creation. New sessions can use that version after the snapshot is ready.
The snapshot prepares the sandbox image by applying the published runtime plan and setup script.
Wait until the snapshot status is ready before starting a session. If snapshot creation fails, inspect the snapshot output, update the draft profile, and publish a new version.
Save the draft when your profile settings are ready.
## Publish And Wait For The Snapshot
Select **Publish** on the draft profile version.
Publishing creates the published profile version and queues snapshot creation. New sessions can use that version after the snapshot is ready.
The snapshot prepares the sandbox image by applying the published runtime plan and setup script.
Wait until the snapshot status is ready before starting a session. If snapshot creation fails, inspect the snapshot output, update the draft profile, and publish a new version.
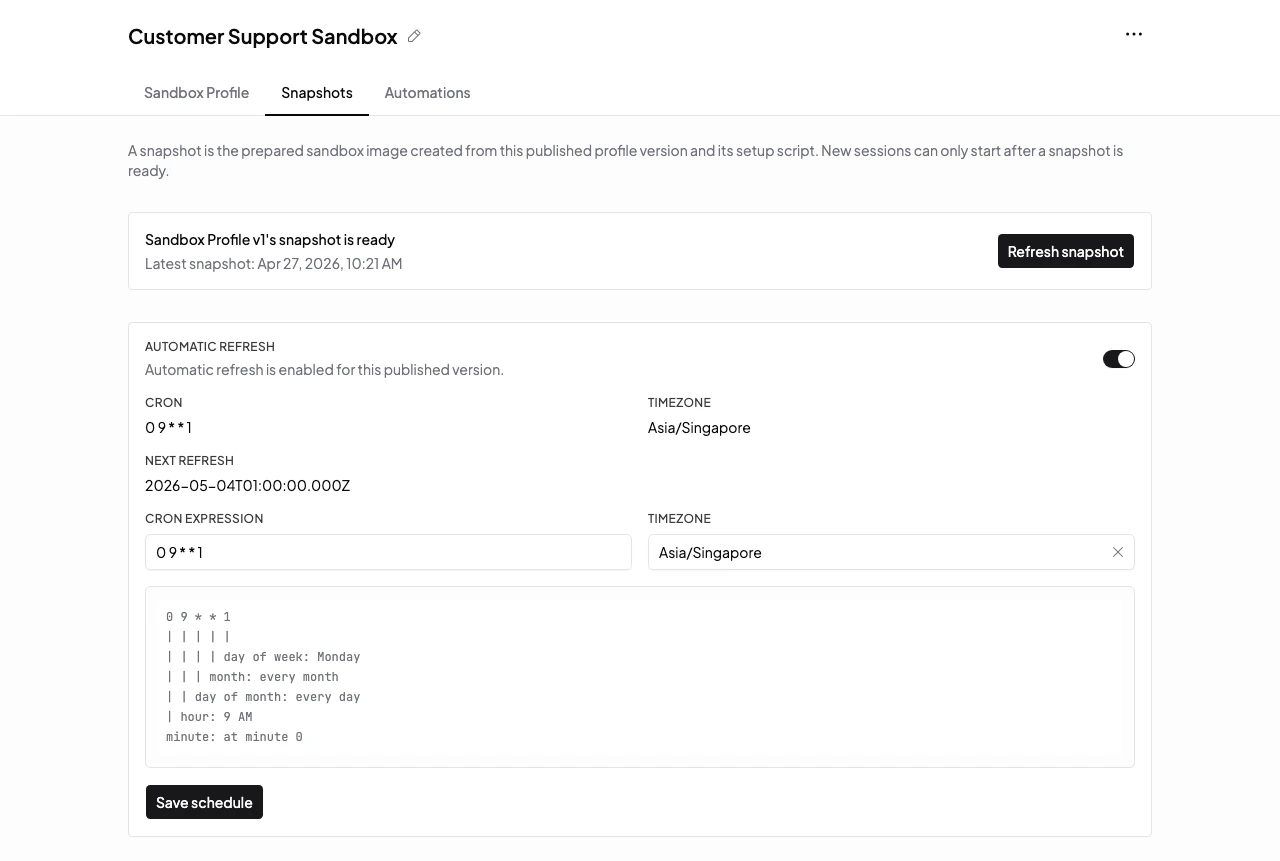 Read [Snapshots](/guides/snapshots) for the snapshot lifecycle.
## Start A Session
Open **Sessions**, create a new session, and select:
* **Sandbox profile**: the profile you just published.
* **Primary repository**: the GitHub repository where the agent should start.
Select **Start session**. Mistle starts a sandbox instance from the published profile snapshot and opens the session workbench.
Read [Snapshots](/guides/snapshots) for the snapshot lifecycle.
## Start A Session
Open **Sessions**, create a new session, and select:
* **Sandbox profile**: the profile you just published.
* **Primary repository**: the GitHub repository where the agent should start.
Select **Start session**. Mistle starts a sandbox instance from the published profile snapshot and opens the session workbench.
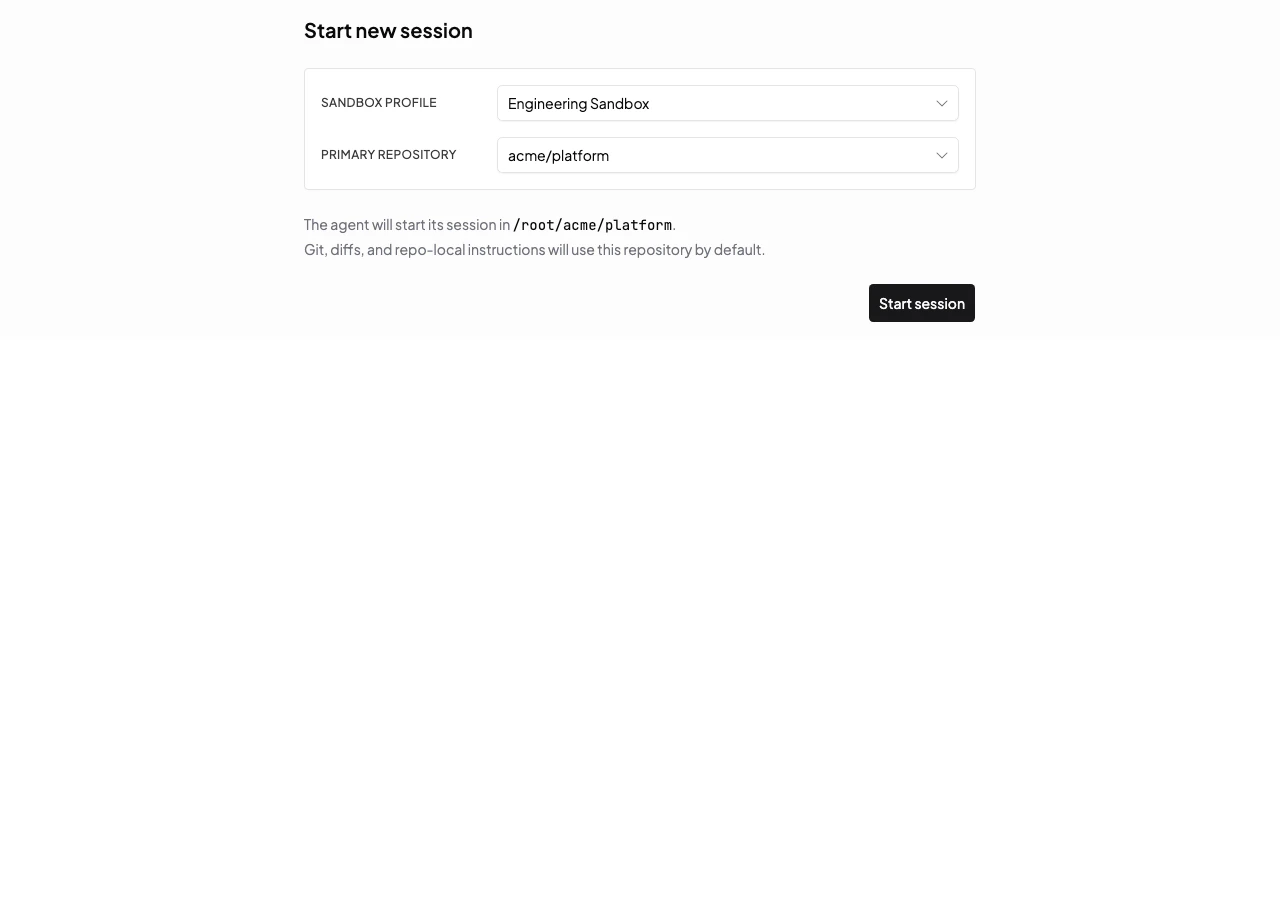 After the workbench opens, send the agent a small first task so you can confirm the profile, repository, and model connection are working together.
## Next steps
* Read [Sandbox Profiles](/guides/sandbox-profiles) to understand how sandbox environments are configured.
* Read [Sessions](/guides/sessions) to learn how to use the session workbench.
* Add connector integrations when the agent needs access to Slack, Jira, Linear, Datadog, or other external systems.
After the workbench opens, send the agent a small first task so you can confirm the profile, repository, and model connection are working together.
## Next steps
* Read [Sandbox Profiles](/guides/sandbox-profiles) to understand how sandbox environments are configured.
* Read [Sessions](/guides/sessions) to learn how to use the session workbench.
* Add connector integrations when the agent needs access to Slack, Jira, Linear, Datadog, or other external systems.